Simple Soil Preparation Steps for New Turf and Planting
If you want new turf to knit in properly or fresh plants to settle without sulking, the real work starts before anything goes into the ground. Simple soil preparation steps for new turf and planting can make the difference between a patchy, thirsty-looking result and a border or lawn that actually thrives. It is not glamorous. No one snaps photos of a well-raked seedbed, do they? But in practice, the groundwork is what gives you better drainage, stronger roots, and fewer headaches later.
This guide breaks the process down in plain English. You will see what to do, why it matters, where people commonly go wrong, and how to judge whether your soil is ready for turf, shrubs, perennials, or new beds. I have kept it practical, because that is what most people need on site: clear steps, sensible priorities, and a bit of realism.
For homeowners, landlords, small developers, and anyone improving an outdoor space, these steps are the foundation of a tidy, long-lasting finish. And if you are weighing up whether to do it yourself or bring in help, resources like pricing and quotes can give you a better sense of the likely route forward without any guesswork.
Table of Contents
- Why Simple Soil Preparation Steps for New Turf and Planting Matters
- How Simple Soil Preparation Steps for New Turf and Planting Works
- Key Benefits and Practical Advantages
- Who This Is For and When It Makes Sense
- Step-by-Step Guidance
- Expert Tips for Better Results
- Common Mistakes to Avoid
- Tools, Resources and Recommendations
- Law, Compliance, Standards, or Best Practice
- Options, Methods, or Comparison Table
- Case Study or Real-World Example
- Practical Checklist
- Conclusion
- Frequently Asked Questions
Why Simple Soil Preparation Steps for New Turf and Planting Matters
Soil prep is not just about making the ground look neat. It sets the conditions for roots to establish, for water to move through the profile, and for nutrients to be available when the plant needs them. If the soil is compacted, full of debris, or badly graded, turf can dry out in one corner and sit waterlogged in another. Plants can look fine for a few weeks and then stall. That is the annoying bit - the problem often shows up after the job is finished.
New turf needs close contact with a fine, even, settled surface underneath it. If there are lumps, stones, or air pockets, the roots struggle to connect with the soil below. New planting beds need a different but related setup: loose enough for roots to spread, firm enough to hold the plant steady, and enriched enough to support early growth. Get that balance wrong and you end up watering more, feeding more, and still wondering why everything looks tired.
In many UK gardens, especially older ones, the soil has been compacted over years of foot traffic, storage, or previous building work. Clay can become sticky in wet weather and hard as a brick in dry spells. Sandy soils may drain quickly but struggle to hold moisture and nutrients. Preparing the ground properly helps you work with what you have, rather than fighting it all season.
Expert summary: good soil preparation is less about perfection and more about creating a stable, workable, well-drained rooting zone. If the base is right, most of the visible job gets easier. If the base is poor, you are always catching up.
How Simple Soil Preparation Steps for New Turf and Planting Works
The process is straightforward in principle. First, you clear the area. Then you assess the soil structure, improve it where needed, and level or shape the surface so water behaves sensibly. After that, you make sure the top layer is suitable for turf laying or planting. Simple enough in theory, but the detail matters more than people expect.
For new turf, the target is usually a fine, firm, even surface with no hollows or raised spots. The soil beneath should be moist but not sticky, and there should be enough organic matter to support rooting without creating an unstable, sponge-like layer. For planting, you generally want the hole or bed area loosened beyond the root ball, then backfilled with soil that is free of rubble and not overworked into dust. Roots need oxygen as much as they need moisture. A lot of folk forget that part.
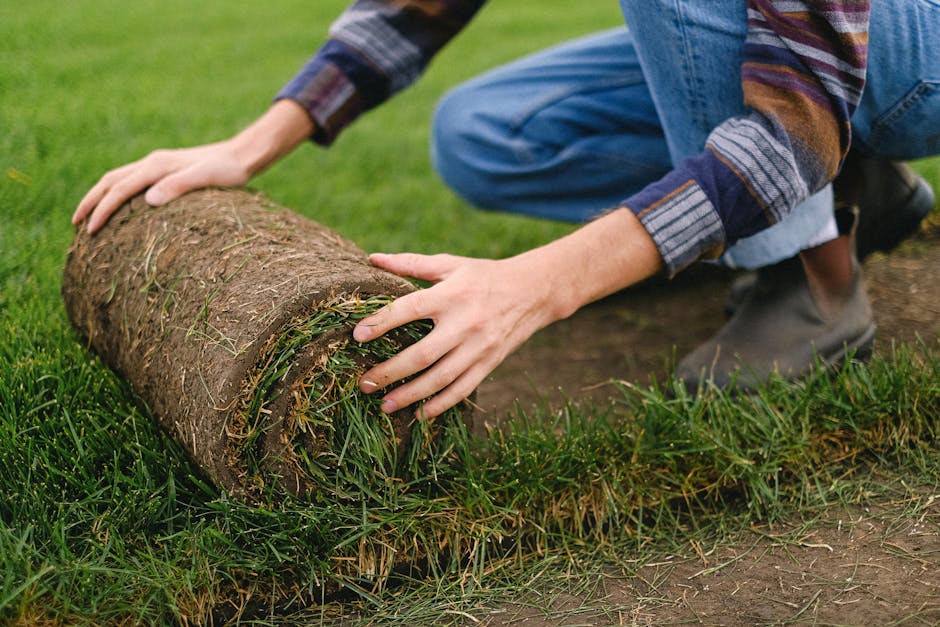
Think of it this way: turf is a living carpet that needs close contact from day one. Planting is more like helping a root system move into a new home. Both need a welcoming base. Both suffer when the base is rushed.
In practical terms, the work often follows this pattern:
- remove waste, weeds, and old surface material
- break up compacted soil
- improve drainage and texture if needed
- add topsoil or organic matter where appropriate
- level, rake, and consolidate the surface
- check moisture and make final adjustments before turfing or planting
That is the backbone. The exact tweaks depend on soil type, weather, and what you are planting. A wet November job, for example, calls for more patience than a dry spring refurb. Truth be told, timing matters nearly as much as technique.
Key Benefits and Practical Advantages
There are several very real reasons to spend time on the soil before turf or planting goes in. Some are obvious, others only show up a few weeks later when the garden starts behaving itself.
- Better establishment: roots settle faster when the soil is loose, clean, and properly prepared.
- Improved drainage: a well-shaped base reduces puddling, soft patches, and root stress.
- Less maintenance later: good prep means fewer repairs, less patching, and less frantic watering.
- More even growth: consistent soil conditions help turf and plants develop more uniformly.
- Lower failure risk: many planting problems begin below the surface, not above it.
There is also a quality-of-life benefit. A properly prepared bed or lawn simply looks more finished. Edges sit better. Surfaces feel more solid underfoot. Even the smell of fresh soil after rain has that "job well done" feel, especially on a quiet morning before the neighbours have started their drills.
For commercial or landlord projects, solid prep also helps protect the investment. Replacing failed turf or struggling shrubs costs time and money, and it can quickly spoil the impression of the whole property. If your aim is a tidy result that lasts, soil prep is the unglamorous bit that pays for itself.
Who This Is For and When It Makes Sense
This approach suits anyone preparing ground for a new lawn, new border, fresh tree planting, or a garden refresh after building work. It is especially useful where the existing soil is tired, compacted, or mixed with rubble. In London gardens and similar urban settings, that is fairly common. Old lawns get worn out. Back gardens get used for storage. Trade access can leave the top layer a bit battered. Happens all the time.
You will get the most value from these steps if you are:
- laying new turf on bare or renovated ground
- planting shrubs, perennials, or hedging
- working with mixed soil after renovation or extension works
- trying to improve a patchy, waterlogged, or compacted garden area
- planning a larger landscaping job and want the base right first
If the project is small, you can usually manage with hand tools and a sensible weekend plan. If the site is bigger, has heavy clay, or includes poor drainage and level changes, it may be worth speaking to a professional early. You can also look at the company background on the about us page if you want a better sense of the team and approach before making contact.
Sometimes the smartest move is not to overcomplicate it. If the ground is straightforward, keep the prep simple. If it is a bit of a nightmare, admit that early. Saves a lot of grief.
Step-by-Step Guidance
The most useful way to handle soil prep is to follow a clear sequence. Skip steps and you usually end up redoing them later. No mystery there.
1. Clear the area properly
Start by removing weeds, old turf, stones, broken pots, construction debris, roots, and any buried rubbish. If you are preparing a border, take out worn mulch, dead stems, and anything that will interfere with the new planting layout. For turf, the surface needs to be as clean as possible so the roots can make immediate contact with the soil below.
A quick sweep is not enough. Be thorough. Tiny bits of rubble can create bumps under turf, and that is exactly the sort of thing you notice later when mowing.
2. Assess the soil type and condition
Try to understand what you are working with. Clay soil holds water and nutrients but can compact easily. Sandy soil drains quickly but may need organic matter to retain moisture. Silt and loam sit somewhere in between. Dig a small hole, crumble some soil in your hand, and pay attention to the texture. Is it sticky? Dry and loose? Full of stones? That tells you a lot.
Also check for compaction. If a spade goes in with a bit of a fight, or water sits on the surface after rain, the soil probably needs loosening and reshaping. This stage is where people often realise the problem is bigger than they thought. That is fine. Better now than after planting.
3. Loosen compacted ground
Fork over the soil or use a garden cultivator to break up the top layer. For new turf, you want the topsoil to be fine and friable without being powdery. For planting beds, loosen the soil to a decent depth so roots can explore. Avoid working saturated soil, though. If it sticks to your boots and tools like glue, step back. Working wet soil can make compaction worse, not better.
On heavier ground, a bit of aeration can help. This does not need to be fancy. The goal is simply to create air spaces and improve movement of water and roots through the profile.
4. Improve the structure with the right material
Add well-rotted organic matter where needed. Compost, soil conditioner, or screened topsoil can improve structure, depending on the site. The exact amount depends on what is already there, which is why it is worth not overdoing it. Too much rich material in a planting hole can create a layer that roots do not want to leave. That old "pot effect" problem is a bit of a classic.
For turf, the aim is a smooth top layer that supports healthy rooting and even moisture movement. For planting, the aim is a backfill that is workable, stable, and not wildly different from the surrounding ground.
5. Shape levels and drainage
Use a rake and board to create an even surface for turf. You are looking for gentle falls away from buildings where needed and no shallow basins that collect water. Around planting areas, shape the soil so water reaches roots without pooling. If you have a naturally wet area, think carefully before adding more soil in the wrong place; sometimes the better fix is improving drainage or choosing plants suited to the conditions.
This stage is especially important near patios, paths, sheds, and extensions. Water must go somewhere sensible, not just sit there in a miserable little puddle after every shower.
6. Rake to a fine tilth for turf
A fine tilth is simply a smooth, crumbly surface with no large clods. For new turf, this matters because the underside of the rolls must sit flush on the soil. Rake, tread lightly, and then rake again. It is a bit repetitive, yes. But that is how you get a proper finish.
Remove any last stones and debris as you go. A surprising amount of trouble starts with one or two forgotten lumps.
7. Firm the soil before laying turf or planting
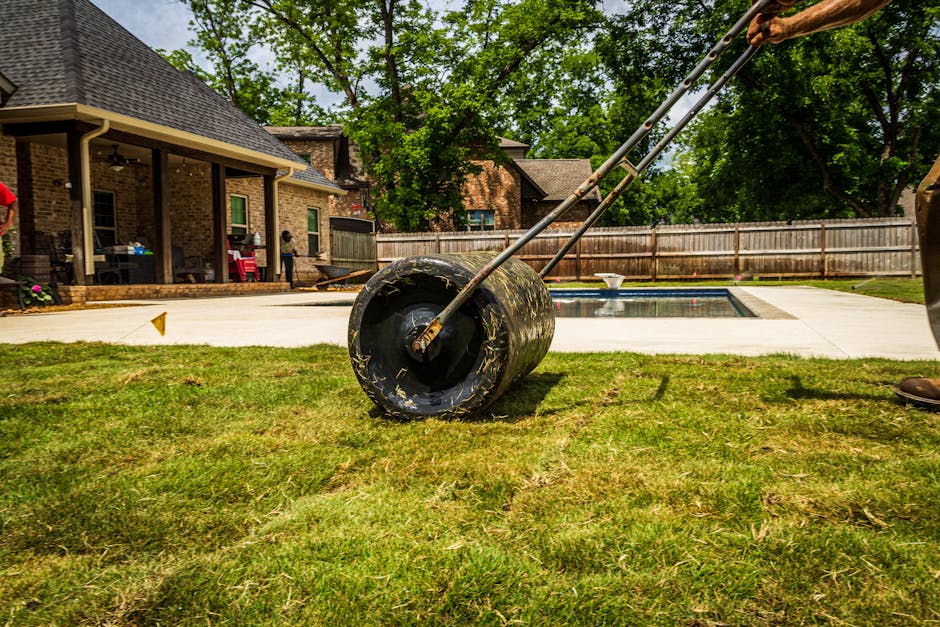
Consolidation sounds technical, but it just means settling the soil so it is not too loose. You can do this by lightly treading the area, then raking it level again. For planting, firm around the root ball once the plant is in place, ensuring there are no air pockets. For turf, the soil should feel firm underfoot without being rock-hard.
A good test is simple: if your heel sinks deeply, it is too soft; if the surface feels baked and lifeless, it may be too hard. You want the middle ground.
8. Water at the right moment
Moisten the soil lightly before turfing or planting if conditions are dry. Do not soak it. A light pre-wet helps roots and soil make contact. After laying turf or planting, water thoroughly so the root zone settles in. The first watering is not a throwaway step - it is part of the installation itself.
If the weather is overcast and damp, adjust accordingly. If it is a warm, breezy afternoon in late spring, you may need to water more promptly than you expected. The soil will tell you, if you pay attention.
Expert Tips for Better Results
Small adjustments can make a big difference, and in our experience, they are often the bits people skip because they seem too minor to matter. They do matter.
- Work with soil moisture, not against it: slightly damp soil is manageable; wet soil compacts; dry soil can be dusty and awkward to shape.
- Separate turf prep from planting prep where needed: they are related, but not identical. Turf wants a smoother, firmer finish than most planting beds.
- Be careful with too much compost in planting holes: blend sensibly rather than creating a rich pocket that roots avoid later.
- Check edges and corners: awkward spots often get less attention and cause the visible problems later.
- Think in layers: surface, topsoil, subsoil, and drainage all influence success.
One handy habit is to stand back every so often and look at the area from the doorway or path. You will often spot a dip or mound that was invisible while you were standing in the middle of the bed. Funny how that works.
If the project is part of a larger garden refresh, it can help to plan waste handling at the same time. Services that focus on recycling and sustainability are worth considering when you are clearing old turf, branches, or debris from the site.
Common Mistakes to Avoid
Most poor results come from a handful of avoidable errors. None of them are dramatic on their own, but together they can turn a simple job into an annoying repeat.
- Skipping clearance: turf over rubble or weeds rarely settles well.
- Working wet clay: this compresses the soil and makes drainage worse.
- Over-enriching planting holes: roots may stay in the amended pocket instead of spreading out.
- Leaving uneven levels: dips collect water, and humps dry out faster.
- Not firming enough: loose soil around roots or turf creates voids and weak establishment.
- Using the wrong finish for the job: a lawn needs a finer, firmer prep than a mixed border.
Another common one is rushing the final check because the soil "looks about right." That phrase has caused a lot of call-backs over the years. Looks about right is not a method.
If you are unsure whether drainage or compaction is the main issue, it is usually worth pausing and reassessing rather than powering on blindly. A little caution now can save a lot of patching later.
Tools, Resources and Recommendations
You do not need a warehouse of equipment to prepare soil well, but the right tools make the job more accurate and less tiring. A small kit goes a long way.
| Tool or material | Best use | Why it helps |
|---|---|---|
| Garden fork | Loosening compacted soil | Breaks up the top layer without over-churning it |
| Rake | Levelling and creating a fine tilth | Helps shape an even turfing surface |
| Spade | Removing debris and shaping beds | Useful for edging, lifting, and controlled digging |
| Wheelbarrow | Moving spoil, topsoil, or compost | Makes repeated material movement much easier |
| Topsoil or compost | Improving structure and depth | Supports roots and balances poor ground |
| Straight board or long timber | Checking levels | Helps spot bumps and hollows quickly |
For larger gardens or sites with mixed waste, the logistics matter as much as the gardening. You may also want to review health and safety policy information if machinery, lifting, or access issues are part of the project. That is less exciting than the turfing itself, but it is the grown-up part of the job.
If you are arranging work through a contractor, it is sensible to check practical details such as insurance and safety, and if you are still comparing options, the page on pricing and quotes gives a straightforward next step. Simple, really.
Law, Compliance, Standards, or Best Practice
For domestic soil preparation, there is usually no special legal hurdle just for laying turf or planting shrubs. That said, sensible best practice still matters. If your work involves digging near boundaries, drains, retaining walls, or shared access, you should think carefully about safety and any property-related responsibilities. If there is machinery on site, follow normal site safety precautions and use appropriate protective gear.
For larger or more formal projects, especially where contractors are involved, it is wise to work in a way that reflects accepted horticultural standards: safe handling, proper waste disposal, sensible material selection, and care around existing services underground. If you are unsure about buried cables, pipes, or old foundations, do not guess. Check first.
From a practical standpoint, good gardening practice also includes responsible waste handling and tidy site management. That ties in naturally with sustainability and recycling, particularly if you are removing old soil, turf, or plant material. It is not just about looking neat; it is about leaving the site stable and usable.
If you want to understand the service approach and company values a bit more, the home page and about us section are useful starting points. And if you have a question about a specific job, the contact us page is the natural next stop.
Options, Methods, or Comparison Table
Not every site needs the same level of soil work. A tiny urban front garden and a full rear-lawn renovation will not be treated the same way. The goal is to match the preparation to the job, not to overdo it because it feels safer.
| Method | Best for | Strengths | Watch-outs |
|---|---|---|---|
| Light surface prep | Small planting areas with decent existing soil | Quick, cost-effective, minimal disruption | Not enough for compacted or poor-quality ground |
| Full soil cultivation | Lawns, larger borders, tired or compacted beds | Improves structure and rooting depth | Can be too much if the soil is already friable |
| Topsoil import and regrading | Major levelling, renovation, or bad existing soil | Creates a fresh, controlled base | Requires more planning, material handling, and cost |
| Targeted planting-hole prep | Individual shrubs, trees, and focal plants | Efficient for small-scale planting | Needs care to avoid over-amending the hole |
The right method depends on budget, access, soil condition, and what comes next. A lot of the time, the best answer is not the fanciest one - just the one that gets roots into stable ground without drama.
Case Study or Real-World Example
Imagine a typical rear garden in a London terrace: the old lawn has thin, bare patches near the patio, the centre feels hard underfoot, and the far corner stays damp after rain. The owners want new turf down the middle and some planting along one side to soften the fence line.
The first job is clearance. Out comes the old turf, stray bricks, broken plastic edging, and a surprising number of pebbles left behind by previous work. Then the ground is forked through because the top layer has become compacted from years of regular use. The damp corner is not buried under extra soil right away; instead, the level is adjusted gently so water can move away more naturally.
For the turf area, the surface is raked finer and firmed so the rolls will sit flush. For the planting strip, the soil is loosened a little deeper and blended with well-rotted organic matter so the shrubs can root out properly. No magic trick. Just patient prep.
A few weeks later, the difference is obvious. The turf greens up more evenly because the roots are in good contact with the soil. The planted border settles without wobbling. Watering is still needed, of course, but not in that panicked every-five-minutes way you get when the base has been badly done.
That is the point of proper soil preparation: less drama, more resilience. Rather satisfying, actually.
Practical Checklist
Use this quick checklist before turfing or planting. It is not fancy, but it catches the essentials.
- Remove old turf, weeds, stones, and construction debris
- Check whether the soil is dry enough to work without smearing
- Loosen compacted areas with a fork or cultivator
- Add suitable organic matter or topsoil where needed
- Shape levels so water does not pool in low spots
- Rake the surface to the right finish for turf or planting
- Firm the soil lightly so it is stable but not hard
- Water appropriately before and after installation
- Recheck edges, corners, and awkward access points
- Pause if the ground is too wet, too dry, or clearly unsuitable
Practical takeaway: if the soil is clean, loose, level, and suited to the job, everything after that becomes easier. If not, the problems tend to announce themselves fairly quickly.
Conclusion
Simple soil preparation steps for new turf and planting are not complicated, but they are easy to underdo. Clear the ground, understand the soil, loosen compaction, improve structure where needed, shape levels, and finish with the right firmness for the job. That basic sequence gives turf a better start and gives new plants a proper chance to settle in.
The main thing is not perfection. It is attention. A few sensible choices at the start usually save a lot of repair work later, and the garden ends up looking more settled, more even, and frankly more professional. Whether you are refreshing a small border or starting a full lawn renovation, good prep is the quiet bit that does the heavy lifting.
If you are comparing options for a garden project and want a clearer idea of next steps, the team information on about us, the practical details on pricing and quotes, and the simple route to get in touch can help you move forward with confidence.
Get a free quote today and see how much you can save.
And if you take only one thing from this guide, let it be this: good ground makes good gardens. The rest is just helping it along.
Frequently Asked Questions
What is the first step in soil preparation for new turf?
The first step is clearing the area properly. Remove weeds, old turf, stones, rubble, and any leftover debris so the new turf can sit on a clean, even base.
Do I need to add topsoil before laying new turf?
Not always. If the existing soil is already decent and level, you may only need light improvement. If it is thin, poor, or badly compacted, adding screened topsoil or suitable soil conditioner can help.
How deep should soil be prepared for planting?
It depends on the plant, but the soil should usually be loosened beyond the root ball and improved where necessary so roots can spread. Shrubs and perennials often benefit from a broader prepared area than the actual planting hole alone.
Can I prepare soil when it is wet?
It is usually better not to. Working wet soil can compact it and make the structure worse. If the ground smears or sticks badly to your tools, wait for better conditions.
What is the difference between preparing soil for turf and for planting?
Turf needs a finer, firmer, more even surface so the rolls make full contact with the ground. Planting usually needs a looser rooting zone with enough stability to hold the plant in place.
Should I add compost to every planting hole?
Not automatically. A small, sensible amount can help, but too much can create a rich pocket that roots stay in rather than moving outward. Blend materials carefully and avoid over-amending.
How do I know if my soil is compacted?
If the soil is hard to dig into, drains badly, or feels dense and lifeless, it may be compacted. A simple fork test often tells you a lot. If the fork struggles to enter and the ground feels blocky, that is a clue.
What tools do I need for basic soil preparation?
A spade, garden fork, rake, wheelbarrow, and a way to check levels are usually enough for basic work. For larger areas, some form of mechanical cultivation may be useful, but not always necessary.
How long should I wait after preparing soil before planting or turfing?
Usually you should move on once the soil has been shaped, firmed, and is in the right moisture condition. There is no fixed waiting period. The key is making sure the ground has not been overworked or left too loose.
Is soil preparation worth the effort for a small garden?
Yes, absolutely. Even a small bed or lawn patch benefits from proper prep. In fact, small areas often show mistakes more clearly because there is nowhere for poor levels or bad drainage to hide.
What if my garden has heavy clay soil?
Clay soil can still work well, but it usually needs more careful handling. Avoid working it wet, improve the structure with suitable organic matter, and make sure drainage and levels are sensible before planting or turfing.
Can professional gardeners help with soil prep only?
Yes. Many people bring in help just for the groundwork, especially where the site is large, uneven, or awkward to handle. It can save time and help avoid expensive mistakes later.
How much does soil preparation usually cost?
Costs vary with the size of the area, the soil condition, access, waste removal, and whether topsoil or other materials are needed. For a realistic starting point, it is best to request a tailored quote rather than rely on a rough guess.
Where can I get help if I am unsure about the job?
If the ground is patchy, compacted, or you are not sure what the soil needs, speak to a local gardening professional. A quick assessment can clarify whether simple prep is enough or whether the site needs something more involved.